

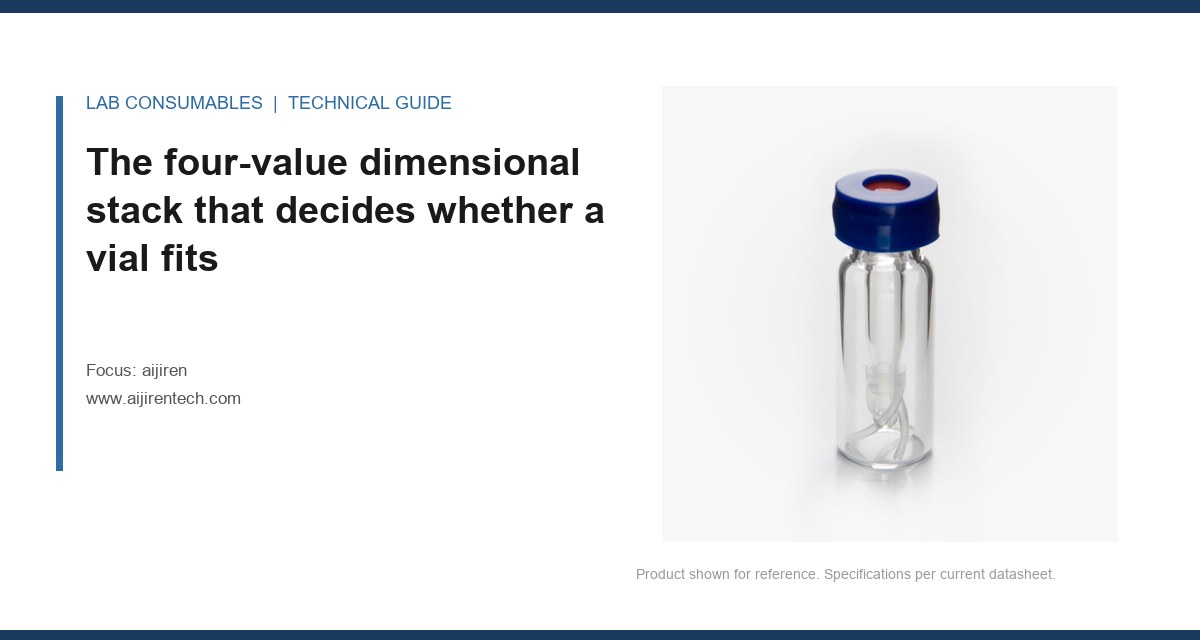
A 9 mm screw-top vial from one supplier seated fine in an Agilent 7693A tray, but the same nominal size from a second lot jammed the gripper on position 14 at 1:40 a.m. The run stopped, 47 samples sat idle, and the root cause was not the vial OD. It was a 0.15 mm difference in neck height that changed where the cap thread engaged. If you are checking aijiren size compatibility with a specific autosampler or inlet model, you need to measure four dimensions, not one, and you need to know which dimension your instrument actually references when it picks up, seats, and punctures the vial.
Every autosampler and GC inlet has a physical reference point. Some reference the vial bottom, some the shoulder, some the top of the cap. Aijiren vials, like every serious chromatography vial, are specified by four values that stack on top of each other. Get one wrong and the vial can look identical on a caliper check but fail in the tray.
- Outside diameter (OD): 12 mm for standard autosampler vials, 8 mm for limited-volume inserts and some Shimadzu trays, 15 mm for older headspace platforms.
- Vial height: 32 mm is the standard for 12 mm vials, but 40 mm and 45 mm tall versions exist for specific Agilent and CTC PAL drawers.
- Neck finish: 9 mm short thread, 10 mm crimp, 11 mm crimp, 13 mm screw, 18 mm headspace, 20 mm headspace. The finish controls cap engagement and septum compression.
- Insertion depth: how far the needle travels before it reaches the liquid or the insert bottom. This is set by vial height, cap thickness, and whether you use a fixed or spring insert.
These four values are not independent. A 12 mm OD vial with a 32 mm height and a 9 mm short-thread neck has a shoulder position that sits 18.5 mm from the bottom on most Aijiren tooling. If the shoulder moves up by 0.2 mm, the gripper on a Waters 2707 or an Agilent 1260 Infinity II may still pick it up, but the needle depth calculation shifts. Most instruments do not measure the vial. They assume the geometry and drive the needle to a programmed depth. That assumption is where compatibility failures hide.
Match the neck finish first, because it fails before the OD does
OD is the dimension people check first, but neck finish is the one that fails first in a tray. The reason is mechanical: the cap and septum are the interface between the vial and the needle, and the autosampler arm applies a vertical force through that interface. A 9 mm short-thread vial in a tray designed for 9 mm threads will seat if the OD is 11.6 to 12.0 mm. The same vial in a tray set up for 10 mm crimp tops will not seat at all, or it will seat loosely and the cap will tilt under puncture.
I have seen a lab order 9 mm screw-top Aijiren vials for a PerkinElmer HS-40 headspace autosampler that required 22 mm headspace vials. The OD difference was obvious, but the operator had not checked the neck finish because the purchase order said “12 mm vials.” The 12 mm OD was correct for the tray, but the 9 mm neck was wrong for a headspace crimper. The entire lot went back, and the delay was three days.
Check the instrument manual for the exact neck finish, not just the vial OD. Agilent GC autosamplers with the 7693A tower use 9 mm short-thread vials for liquid injection and 11 mm crimp or 20 mm headspace vials for headspace. Thermo Fisher TriPlus RSH systems use 10 mm crimp for liquid and 20 mm crimp for headspace. Shimadzu AOC-20i and AOC-6000 use 9 mm short-thread or 10 mm crimp depending on the tray. The neck finish is printed on the instrument spec sheet, but it is often buried in a footnote.
Why vial height matters more than most procurement checklists admit
Vial height is the dimension that causes the most intermittent failures. An autosampler gripper can tolerate a 0.1 mm OD variation by adjusting its fingers, but a 0.3 mm height difference changes the vertical registration point. On a CTC PAL with a 32 mm vial tray, a 31.7 mm vial sits low enough that the needle tip hits the septum at a slight angle on the downstroke. The septum deforms asymmetrically, and after 10 to 15 punctures the cap leaks. The vial still “fits” in the tray. The run still starts. The failure is a slow RSD drift that looks like an injection problem, not a vial problem.
Aijiren 12 mm vials are manufactured to a 32 ± 0.25 mm height tolerance for the standard 2 mL format. That matches the Agilent 7693A, Waters 2707, and Shimadzu AOC-20i specifications. But some instruments require a taller vial. The Agilent 1260 Infinity II with the G7129A autosampler uses a 32 mm vial in the standard drawer, but the well-plate drawer expects 12 × 32 mm vials with a specific shoulder geometry. If you mix a 32 mm Aijiren vial with a 40 mm vial in the same run, the gripper will pick up both, but the needle depth calculation is fixed. The 40 mm vial gets punctured deeper, and if it contains a fixed insert, the needle can bottom out and bend.
Measure vial height with a caliper, not a ruler. A ruler gives you ±0.5 mm at best, which is wider than the tolerance band on most autosampler trays. A digital caliper with 0.01 mm resolution will show you whether a lot is running at the top or bottom of the tolerance. If you are validating a method, record the vial height for the lot you qualify. When the next lot arrives, measure 10 vials from the box. If the mean has shifted by more than 0.15 mm, the needle depth in your method may no longer match the physical vial.
The insertion depth stack: cap, septum, and insert interact
Insertion depth is not printed on the vial. It is the sum of the cap height above the vial rim, the septum thickness, and the distance from the septum underside to the liquid surface. For a 9 mm short-thread Aijiren vial with a standard 8 mm cap and a 1.5 mm PTFE/silicone septum, the needle tip reaches the septum at about 1.2 mm below the cap top. It then travels through 1.5 mm of septum before entering the headspace. The autosampler drives the needle to a programmed depth, typically 3 to 5 mm below the septum underside for a 2 mL fill volume.
If you switch from a 1.5 mm septum to a 2.0 mm septum without changing the method, the needle tip stops 0.5 mm higher relative to the liquid. That is enough to change the injection volume on some instruments. On an Agilent 7683 or 7693A, the needle stroke is fixed by the method, not by the vial. The instrument assumes the septum thickness matches the default. A thicker septum reduces the effective needle depth into the vial, and the injected volume drops slightly. You will see it as a low area count on the first injection, then a recovery on subsequent injections as the septum compresses.
Inserts add another layer. A 250 µL fixed insert in a 12 × 32 mm vial sits on the vial bottom. A spring insert sits on a spring that compresses when the needle pushes down. The spring insert changes the effective insertion depth by up to 1 mm depending on the spring rate. If your method was written for a fixed insert and you switch to a spring insert from Vials With Caps, the needle may not reach the liquid in a low-volume sample. Check the insert type before you change anything else.
Autosampler-specific compatibility: what to measure for the big three platforms
The three autosampler families that generate the most compatibility questions are the Agilent 7693A/7683 series, the Thermo Fisher TriPlus RSH, and the Shimadzu AOC series. Each one references a different part of the vial.
Agilent 7693A and 7683 liquid autosamplers
These towers pick up the vial by the cap, not the glass body. The gripper closes around the cap top and lifts. That means the cap diameter and cap height are part of the dimensional stack. Aijiren 9 mm short-thread vials with 8 mm caps work, but the cap must be a screw cap, not a crimp cap. The 7693A tray is machined for 12 mm OD vials with a 32 mm height. The gripper tolerance on cap OD is 7.8 to 8.2 mm. If you use a cap with a 8.5 mm OD, the gripper may not close cleanly, and the vial can drop mid-transfer. I have seen a 7693A drop three vials in a row because the cap OD was 8.4 mm from a third-party supplier. The vials were fine. The caps were the problem.
Thermo Fisher TriPlus RSH
The TriPlus RSH uses a robotic arm with a vial gripper that references the vial shoulder, not the cap. The shoulder is the transition from the 12 mm body to the neck. On a 10 mm crimp vial, the shoulder sits at a specific height from the bottom. If the shoulder radius is too sharp or too shallow, the gripper fingers slide instead of locking. Aijiren 10 mm crimp vials have a shoulder angle that matches the TriPlus RSH specification, but you need to verify the crimp cap is fully seated. An under-crimped cap leaves a 0.1 mm gap between the cap skirt and the vial shoulder, and the gripper reads that as a different height.
Shimadzu AOC-20i and AOC-6000
The AOC-20i uses a tray that holds 12 mm vials in a fixed rack. The injection needle descends through a guide hole in the tray cover. The guide hole is sized for a 12 mm OD vial with a 32 mm height. If the vial is shorter than 31.7 mm, the cap sits below the guide hole, and the needle can strike the cap edge instead of the septum center. The AOC-6000, which is a CTC PAL derivative, uses the same 32 mm height reference but has a tighter cap tolerance. Measure the cap height and the vial height together. The combined stack for a 9 mm short-thread Aijiren vial with an 8 mm cap should be 40 ± 0.3 mm. If it is 40.5 mm, the AOC-6000 gripper may push the vial down too far in the tray, and the needle tip will hit the insert bottom.
GC inlet compatibility: the septum and liner interface
GC inlets do not care about the vial OD or height. They care about the septum that sits in the inlet and the liner that holds the sample after injection. But the vial and cap you choose affect the septum in the inlet indirectly. A vial cap with a poorly matched septum can shed particles during puncture. Those particles travel up the needle and deposit in the inlet liner. After 50 injections, the liner is coated with septum debris, and the peak shape degrades.
For GC inlets, the relevant Aijiren dimension is the septum diameter and thickness in the cap. A 9 mm short-thread cap uses a 9 mm septum. A 10 mm crimp cap uses a 10 mm septum. The septum must match the cap exactly. A 9 mm septum in a 10 mm cap leaves a 0.5 mm radial gap, and the septum can rotate or lift during puncture. That changes the puncture location and can cause a leak at the cap-septum interface.
The Agilent GC inlet uses a septum that is typically 11 mm for split/splitless inlets and 5 mm for on-column inlets. The vial septum is a different part. Do not confuse the two. The vial septum is punctured by the autosampler needle before injection. The inlet septum is punctured by the syringe needle during injection. Both need to be PTFE-faced silicone, but the dimensions are different.
Comparison table: Aijiren vial dimensions by autosampler platform
This table is the decision checklist I use when a customer sends me an instrument model and asks which Aijiren vial to buy. It covers the most common liquid and headspace configurations.
| Autosampler or inlet | Vial OD (mm) | Vial height (mm) | Neck finish | Cap type | Combined stack height (mm) |
|---|---|---|---|---|---|
| Agilent 7693A liquid | 12 | 32 | 9 mm short thread | 8 mm screw | 40 ± 0.3 |
| Agilent 7683 liquid | 12 | 32 | 9 mm short thread | 8 mm screw | 40 ± 0.3 |
| Agilent 7697A headspace | 22 | 46 | 20 mm crimp | 20 mm crimp | 46 ± 0.3 |
| Thermo TriPlus RSH liquid | 12 | 32 | 10 mm crimp | 10 mm crimp | 40 ± 0.3 |
| Thermo TriPlus RSH headspace | 22 | 46 | 20 mm crimp | 20 mm crimp | 46 ± 0.3 |
| Shimadzu AOC-20i | 12 | 32 | 9 mm short thread | 8 mm screw | 40 ± 0.3 |
| Shimadzu AOC-6000 | 12 | 32 | 9 mm short thread or 10 mm crimp | 8 mm screw or 10 mm crimp | 40 ± 0.3 |
| PerkinElmer HS-40 headspace | 22 | 46 | 22 mm crimp | 22 mm crimp | 46 ± 0.3 |
| Waters 2707 liquid | 12 | 32 | 9 mm short thread | 8 mm screw | 40 ± 0.3 |
The combined stack height is the vial height plus the cap height above the vial rim. For a 9 mm short-thread Aijiren vial, the cap adds 8 mm. For a 10 mm crimp vial, the crimped cap adds 8 mm. For a 20 mm headspace vial, the cap adds 0 mm because the crimp sits flush with the vial rim. If your measured stack height is outside the tolerance in the table, the vial will not register correctly in the autosampler, even if the OD is correct.
Field case: the 0.15 mm neck height shift that stalled a 47-sample sequence
A contract lab running USP method 621 on a Waters 2707 autosampler started a 47-sample sequence at 11:20 p.m. The first 13 vials injected normally. At position 14, the gripper picked up the vial, moved it toward the injection port, and dropped it. The vial landed on its side in the tray, and the sequence aborted. The operator restarted the sequence, and the same vial dropped again at the same position.
I measured the dropped vial against a vial from position 13. The OD was identical at 11.98 mm. The height was identical at 32.02 mm. The neck height, measured from the vial bottom to the top of the thread, was 18.65 mm on the position 13 vial and 18.50 mm on the position 14 vial. A 0.15 mm difference. The gripper on the 2707 references the neck, not the cap. When the neck sits 0.15 mm lower, the gripper fingers close at a slightly different angle, and the vial slips.
The fix was not a new autosampler or a new method. It was a lot traceability issue. The position 14 vial came from a different Aijiren production lot that had run at the bottom of the neck height tolerance. The lab had mixed two lots in the same tray. We sorted the vials by lot, measured 10 from each, and confirmed the second lot was 0.12 to 0.18 mm shorter at the neck. The lab returned the second lot and reordered from a single lot. The sequence ran clean after that.
Field case: the Shimadzu AOC-20i that bent needles on fixed inserts
A QC lab running pesticide residues by U.S. EPA SW-846 method 8081 on a Shimadzu AOC-20i started bending autosampler needles at a rate of one per week. The symptom was a bent needle tip that would not seat in the injection port. The lab blamed the autosampler, then the needle supplier, then the operator.
I measured the vials. They were 12 × 32 mm Aijiren vials with 9 mm short-thread necks, correct for the AOC-20i. The caps were 8 mm screw caps with 1.5 mm PTFE/silicone septa, also correct. The inserts were 250 µL fixed inserts, but the lab had switched from a conical glass insert to a flat-bottom polymer insert from a different supplier. The polymer insert was 0.8 mm taller than the glass insert it replaced. The needle depth in the method was set for the glass insert, and the taller polymer insert left only 0.2 mm of clearance between the needle tip and the insert bottom. On injection, the needle bottomed out and bent.
The fix was to change the needle depth in the AOC-20i method from 4.5 mm to 3.7 mm below the septum underside. That 0.8 mm adjustment matched the taller insert. The alternative was to go back to the conical glass insert. The lab chose to adjust the method, but only after we measured the insert height difference with a caliper. The vial itself was never the problem. The insert was the dimensional variable nobody had checked.
How to verify each dimension before you commit to a lot
You cannot verify aijiren size compatibility with a specific autosampler or inlet model by reading a spec sheet. You need to measure a sample of vials from the actual lot you will receive, and you need to measure the right dimensions in the right order.
- Measure 10 vials from each new lot, not one. A single vial can be an outlier. Ten vials give you a mean and a range. If the range on any dimension exceeds 0.2 mm, reject the lot or quarantine it for manual inspection.
- Measure OD first with a digital caliper at the midpoint of the vial body. The tolerance for 12 mm vials is 11.6 to 12.0 mm. For 8 mm vials, it is 7.8 to 8.2 mm.
- Measure vial height second from the bottom to the top of the rim, not the top of the cap. The tolerance for 12 × 32 mm vials is 32 ± 0.25 mm.
- Measure neck height third from the bottom to the top of the thread or crimp bead. This is the dimension most people skip. For a 9 mm short-thread vial, the neck height is 18.5 ± 0.2 mm. For a 10 mm crimp vial, it is 18.0 ± 0.2 mm.
- Measure cap height fourth with the cap seated on the vial. The combined stack height is what the autosampler sees. Record it for the lot.
- Check the septum thickness with a caliper before capping. A 1.5 mm septum that measures 1.3 mm will change the insertion depth and the puncture count.
If you are qualifying a new supplier, ask for a dimensional certificate with each lot. Aijiren provides this on request. The certificate should list the mean and range for OD, height, neck height, and cap stack height across a sample of 50 vials. If the supplier will not provide it, that is a signal that their process control is not tight enough for regulated work. The Aijiren dimensional certificate is the document I ask for before I approve a new lot for a validated method.
What changes when you move from liquid injection to headspace
Headspace vials are a different dimensional stack entirely. A 20 mm headspace vial has a 22 mm OD, a 46 mm height, and a 20 mm crimp neck. The headspace autosampler seals the vial with a crimp cap that must withstand 2 to 3 bar of internal pressure at 80 to 100 °C. The cap is not just a closure. It is a pressure vessel component.
The critical dimension on a headspace vial is the crimp bead diameter. If the bead is undersized by 0.2 mm, the crimp cap will not seal evenly, and the vial will leak during heating. You will see it as a drop in headspace pressure and a low area count on the first injection. The bead diameter on a 20 mm Aijiren headspace vial is 20.0 ± 0.1 mm. The crimp cap must match that exactly. A 20 mm cap on a 19.8 mm bead will crimp unevenly, and the septum will not compress uniformly.
Headspace vials also have a temperature rating. Aijiren 20 mm headspace vials are rated for 100 °C continuous use and 120 °C for short cycles. If your method heats to 110 °C, you are fine. If you are running a high-temperature headspace method at 150 °C, you need a vial rated for that temperature. Most standard borosilicate vials are not rated above 120 °C, and the cap septa will degrade above 100 °C unless you specify a high-temperature septum.
Septum puncture counts and when to replace the cap
A 1.5 mm PTFE/silicone septum in a 9 mm short-thread Aijiren cap is rated for 10 to 15 punctures with a standard 26-gauge conical needle. That number drops to 5 to 8 punctures with a 23-gauge needle or a beveled needle. The puncture count is not a suggestion. It is a mechanical limit. After 15 punctures, the septum core starts to tear, and the cap can leak.
I have watched a lab reuse the same cap for 25 injections because the cap still looked intact. The septum had a star-shaped tear pattern around the puncture site, and the cap was leaking at 0.5 µL per injection. The RSD on their peak areas was 4.2%, which is above the 2% limit in their method. They replaced the caps at 15 punctures, and the RSD dropped to 1.1%.
The puncture count is set by the septum material, not the vial. A PTFE/silicone septum has a PTFE face that resists solvent attack and a silicone core that reseals after puncture. The PTFE face is 0.25 mm thick on a 1.5 mm septum. After 15 punctures, the PTFE face is perforated, and the silicone core is exposed to the solvent. The silicone core swells, and the reseal performance degrades. If you are running a method with more than 15 injections per vial, use a pre-slit septum. A pre-slit septum is designed for 50 to 100 punctures, but it has a different failure mode: the slit opens up over time, and the vial can leak if it sits for more than a few hours.
Operational precautions that prevent dimensional mismatches
Most dimensional mismatches are not caused by bad vials. They are caused by mixing lots, mixing formats, or changing one component in the stack without checking the rest. These are the precautions I enforce in my own lab and recommend to anyone running a regulated method.
- Do not mix lots in the same tray. A tray is a single-dimensional environment. If one lot runs at the top of the tolerance and another at the bottom, the autosampler sees two different vial populations. Sort by lot and run one lot per tray.
- Do not mix vial heights in the same sequence. A 32 mm vial and a 40 mm vial in the same tray will both be picked up, but the needle depth is fixed. One of them will be injected incorrectly.
- Do not change the insert type without checking the needle depth. Fixed inserts and spring inserts have different heights. A 250 µL fixed insert is 30 mm tall. A 250 µL spring insert is 28 mm tall with the spring compressed. The 2 mm difference changes the effective liquid level.
- Do not change the cap supplier without measuring the cap OD and height. Cap OD is part of the gripper reference on Agilent towers. A 0.2 mm cap OD difference can cause dropped vials.
- Record the dimensional certificate for every lot. When a method drifts, the first thing I check is whether the vial lot changed. If you do not have the certificate, you cannot rule out the vial as the cause.
For more detail on how these dimensions interact with method validation, the Thermo Fisher chromatography and sample handling resources include autosampler drawings that show the reference points. The Restek technical resources have a vial selection tool that cross-references instrument models to vial dimensions, which is useful when you are working with an unfamiliar platform. For a broader view of how vial dimensions fit into the consumable supply chain, Vial Supplier and Lab Chromatography both maintain dimensional cross-reference tables.
Troubleshooting checklist: when the vial fits but the run still fails
If the vial seats in the tray and the autosampler picks it up, but the run still fails, work through this checklist in order. Each item is a measurement, not a guess.
- Check the combined stack height. Measure the vial with the cap on. If it is outside the tolerance in the table above, the gripper or the needle guide is misaligned.
- Check the septum for a star-shaped tear. If you are past the rated puncture count, replace the cap. The leak is not visible, but it is there.
- Check the insert height. If you changed inserts, measure the new one against the old one. A 0.5 mm difference is enough to change the injection volume.
- Check the cap OD. On Agilent towers, the gripper references the cap. A cap OD outside 7.8 to 8.2 mm will cause drops or mispicks.
- Check the needle depth in the method. If the vial, cap, and insert are all correct, the method may have been written for a different dimensional stack. Adjust the depth by the measured difference, not by guesswork.
- Check for lot mixing. If the failure is intermittent and position-specific, you likely have vials from two lots in the same tray. Measure the neck height on the failing positions.
The decision rule is simple. If the measured dimensions of your Aijiren vials fall within the tolerance bands in the comparison table for your specific autosampler or inlet model, the vial is not the problem. If any single dimension is outside the band, fix that dimension before you touch the instrument. The vial is the cheapest component in the stack, and it is the one most people check last.
References & further reading
Related resources from our lab consumables network:
- Aijiren at aijirentech.com
- Vials With Caps at vialswithcaps.com
- Vial Supplier at vialsupplier.com
- Lab Chromatography at labchromatography.com
External references and standards: