

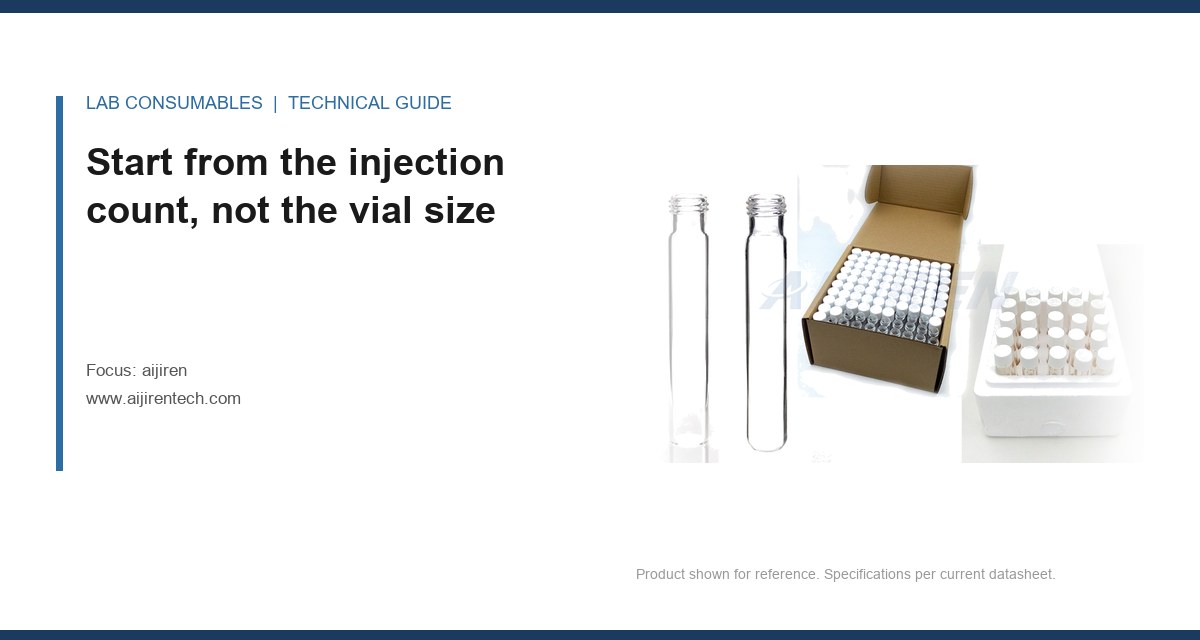
A 2 mL vial filled to 1.8 mL, capped at 1.2 in·lb, and pierced 6 times by a 23-gauge needle is a comfortable working point. The same vial filled to 1.8 mL and pierced 6 times by a 21-gauge needle with a blunt bevel is not, because the larger bore removes roughly 2.4× the septum material per stroke and the residual plug has nowhere to go but down. I have watched that exact combination produce a coring particle in the 12th injection of a 20-injection sequence, with no visible change at the cap. Sizing aijiren capacity and puncture life for a given injection count is arithmetic, not intuition, and the arithmetic starts with three numbers: fill volume, dead volume, and needle gauge.
Most labs buy vials by the case and then discover the injection count per vial during the method transfer. Reverse it. The number that governs everything downstream is the total number of needle penetrations a single septum will see, including standards, blanks, QC injections, and the wash strokes your autosampler performs between them.
Take a 96-position autosampler running a 40-injection sequence with a 3-injection wash between samples. That is not 40 punctures per vial. If the wash station draws from the same vial, you have added 120 penetrations to the run. On a typical 1 mm thick silicone/PTFE septum, a 23-gauge needle will give you somewhere between 50 and 80 clean punctures before the reseal force drops below the pressure the vial sees during heating. A 21-gauge needle cuts that to 30 to 50. A 20-gauge blunt-tip needle can halve it again.
The formula I use is simple:
- Puncture budget = (reseal life at the chosen gauge) ÷ (injections per vial + wash strokes per vial + standard additions per vial)
If the reseal life for a 23-gauge needle is 60 and the per-vial total is 12, you get 5 runs per vial before you should replace it. If it is 60 and the per-vial total is 42, you get 1.4 runs, which means one run and a replacement. That is the sizing decision. Everything else (fill volume, dead volume, cap torque) is downstream of it.
For a broader reference on how these numbers interact across a full consumables program, the technical resources at Restek publish puncture-life curves by gauge and septum thickness that are worth keeping on the bench.
Fill volume: the 40% rule and why 1.5 mL is not the same as 1.5 mL
A 2 mL autosampler vial is nominally 2 mL to the brim. The usable volume is smaller because the septum sits inside the crimp or screw cap and displaces fluid, and because the needle has to reach below the meniscus without touching the bottom. The practical fill range is 40% to 80% of nominal capacity. Below 40%, the needle can aspirate air on a short draw. Above 80%, the septum is wetted, and a wetted silicone septum swells in most organic solvents and loses reseal force faster.
For a 2 mL vial, that puts you between 0.8 mL and 1.6 mL. For a 1.5 mL vial (the narrow-mouth configuration common on older HPLC autosamplers), the range is 0.6 mL to 1.2 mL. For a 4 mL vial, 1.6 mL to 3.2 mL.
The number that matters more than fill volume is the volume the needle actually reaches. On a standard 2 mL vial with a 6 mm ID and a 32 mm height, the needle has to travel from the septum (roughly 5 mm from the top) to the bottom. The autosampler’s stroke depth is fixed. If you fill to 0.8 mL, the liquid column is about 28 mm tall, which is fine. If you fill to 1.6 mL, the column is about 56 mm tall and the needle tip is submerged for the whole draw. Both are workable. What is not workable is filling to 1.9 mL on a 2 mL vial with a 22-gauge needle and a 10 µL draw, because the needle displaces fluid and the meniscus rises into the septum.
Where fill volume and puncture count intersect
Every puncture removes a small volume of septum material. A 23-gauge needle removes roughly 0.4 mm³ per stroke from a 1 mm silicone septum. After 40 strokes that is 16 mm³, which is small in absolute terms but sits as a particle at the bottom of the vial. If your fill volume is 0.8 mL, the particle is within the needle’s draw zone. If your fill volume is 1.5 mL, it is below the draw zone for most autosamplers. This is one reason a slightly higher fill volume extends the practical puncture count: the debris settles out of the aspiration path.
Dead volume: the part of the vial the needle never reaches
Dead volume is the liquid that stays in the vial when the needle is at its lowest stroke. On a standard 2 mL vial with a flat bottom and a 6 mm ID, the dead volume is roughly 100 to 150 µL. On a conical-bottom vial, it drops to 30 to 50 µL. On a fused-insert vial, it can be as low as 15 µL. If you are drawing 5 µL per injection and your dead volume is 120 µL, you are wasting 24 injections’ worth of sample in every vial.
The sizing rule: dead volume should be less than 10% of your fill volume, and ideally less than 5%. If it is more, you are either using the wrong vial geometry or you are overfilling to compensate, which brings you back to the septum-wetting problem.
Dead volume also interacts with puncture count in a way most people miss. As the septum cores, the debris accumulates at the bottom of the vial. If your dead volume is 30 µL and your draw is 10 µL, the debris is in the draw zone after the first few punctures. A conical insert with a 15 µL dead volume and a 50-injection sequence will show particle interference in the injection chromatogram before the septum itself fails. That is not a septum problem. It is a geometry problem.
Needle gauge arithmetic: how bore diameter sets puncture life
The puncture life of a septum is inversely proportional to the cross-sectional area of the needle, not its diameter. A 23-gauge needle has a nominal OD of 0.641 mm. A 21-gauge is 0.819 mm. A 20-gauge is 0.908 mm. The area ratio between 23 and 21 gauge is (0.819/0.641)² = 1.63. Between 23 and 20 gauge it is (0.908/0.641)² = 2.01. So a 20-gauge needle removes twice the septum material per stroke, and you should expect roughly half the puncture life.
The bevel matters as much as the gauge. A blunt-tip needle (common on autosamplers with a septum-piercing guide) cuts a clean plug. A sharp-bevel needle (common on manual syringes) slices. The sharp bevel produces a smaller initial hole but a longer tear along the bevel axis, which reseals poorly. For automated sequences above 20 punctures, use a blunt-tip needle with a 23-gauge or smaller bore and a septum with a PTFE facing on the sample side.
| Needle gauge | Nominal OD (mm) | Relative area vs 23G | Expected punctures, 1 mm silicone/PTFE | Expected punctures, 1.5 mm silicone/PTFE |
|---|---|---|---|---|
| 22G | 0.718 | 1.25 | 45–70 | 70–100 |
| 23G | 0.641 | 1.00 | 50–80 | 80–120 |
| 25G | 0.514 | 0.64 | 80–120 | 120–180 |
| 21G | 0.819 | 1.63 | 30–50 | 50–75 |
| 20G | 0.908 | 2.01 | 25–40 | 40–60 |
These are working ranges from our own bench testing on 1 mm and 1.5 mm silicone/PTFE septa with a 1.2 in·lb crimp and a 23-gauge blunt-tip needle. Your numbers will vary with septum formulation, cap torque, and the temperature the vial sees during the run. A vial held at 60 °C for 30 minutes loses reseal force faster than one held at ambient, because the silicone softens and the compression set increases.
Cap torque is part of the puncture budget
A crimp cap torqued to 1.2 in·lb compresses the septum by roughly 30% of its thickness, which is the range where silicone gives maximum reseal force without permanent deformation. Below 0.8 in·lb, the septum is loose and the needle pushes it into the vial. Above 1.6 in·lb, the septum is over-compressed and the puncture channel does not close. I have seen a lab torque to 2.0 in·lb “to be safe” and cut their puncture life by 40%.
For screw caps, the equivalent is hand-tight plus a quarter turn, which is roughly 1.0 to 1.5 in·lb on a 9 mm screw thread. The GPI 9 mm thread (the standard for most 2 mL autosampler vials) has a specified torque range in the 1.0 to 1.5 in·lb band, and the cap liner compression is designed around that. Over-torquing a screw cap deforms the liner and produces the same failure mode as over-crimping.
The torque number is not just a sealing parameter. It sets the baseline compression that the needle has to overcome on every puncture. A vial torqued to 1.2 in·lb and pierced 40 times with a 23-gauge needle will reseal to a leak rate below 1 × 10⁻⁶ atm·cc/sec for the first 30 punctures and then drift. A vial torqued to 1.8 in·lb will start drifting at puncture 15. The difference is the compression set of the silicone, which is a function of both torque and temperature.
Two field cases where the arithmetic caught the failure
Case 1: the 12th injection coring particle
Symptom: A GC-FID method running 20 injections per vial showed a small unidentified peak at retention time 4.2 minutes starting at injection 12 and growing through injection 20. The peak was not present in the standard.
Measurement: We pulled the vial after injection 12 and inspected the septum under a 10× loupe. A 0.3 mm plug of silicone was missing from the needle track. The needle was a 21-gauge blunt-tip, the septum was 1 mm silicone/PTFE, and the cap was crimped to 1.5 in·lb. The puncture budget for that combination is roughly 40, but the wash station was drawing from the same vial, adding 2 punctures per injection. Effective punctures per injection were 3, not 1. The vial hit 36 punctures by injection 12.
Fix: Moved the wash station to a dedicated wash vial, dropped the crimp to 1.2 in·lb, and switched to a 23-gauge needle. The coring peak disappeared and the puncture budget extended to 60 per vial, which covered the full 20-injection sequence with margin. The lesson is that the injection count is not the puncture count. It is the injection count plus the wash count plus the standard additions.
Case 2: the 1.5 mL vial that would not reseal above 40 °C
Symptom: A headspace method on a 1.5 mL vial showed a leak rate of 2.5 × 10⁻⁵ atm·cc/sec after 5 punctures at 60 °C, well above the 1 × 10⁻⁶ limit. The same vial at ambient held 1 × 10⁻⁷.
Measurement: The septum was 1 mm silicone/PTFE, the cap was a 9 mm screw cap torqued to 1.0 in·lb, and the fill volume was 1.2 mL (80% of nominal). At 60 °C, the silicone softened and the compression set increased. The reseal force dropped below the internal pressure the vial saw during the headspace equilibration. The 1.0 in·lb torque was at the low end of the GPI range, and the 80% fill left no headspace for the vapor to expand into.
Fix: Dropped the fill to 0.9 mL (60% of nominal), increased torque to 1.3 in·lb, and switched to a 1.5 mm septum. The leak rate at 60 °C dropped to 8 × 10⁻⁷ after 5 punctures and held to 12 punctures. The deeper takeaway is that fill volume and torque are not independent. A higher fill volume reduces headspace and increases the pressure the septum has to hold, which reduces the effective puncture life at temperature.
A decision checklist for sizing aijiren to a real injection count
Work through these in order. Stop at the first one that fails and fix it before moving on.
- Step 1: count total punctures per vial. Injections + wash strokes + standard additions + any manual syringe draws. Write the number down.
- Step 2: pick the gauge. 23-gauge blunt-tip for most autosamplers. 25-gauge if the puncture count exceeds 60 per vial. 21-gauge only if the sample is viscous and the puncture count is below 30.
- Step 3: look up the puncture life from the table above for your septum thickness and gauge. Divide by the total punctures per vial. If the result is below 1.5, you need a thicker septum or a smaller gauge.
- Step 4: set fill volume at 40% to 80% of nominal, and check that dead volume is less than 10% of fill. If dead volume is higher, switch to a conical or insert vial.
- Step 5: set cap torque at 1.2 in·lb for crimp, 1.0 to 1.3 in·lb for 9 mm screw. Verify with a torque wrench, not by feel.
- Step 6: verify at temperature. If the method runs above 40 °C, drop the fill volume by one step (e.g., 1.5 mL to 1.2 mL) and increase torque by 0.1 in·lb. Re-check the leak rate.
- Step 7: write the replacement rule into the SOP. “Replace vial after N punctures” is not a rule. “Replace vial after 2 runs of 20 injections plus 40 wash strokes” is a rule.
For the dimensional stack that decides whether the vial fits the autosampler in the first place, the four-value tolerance data at Vials With Caps is a useful cross-check before you commit to a gauge and fill volume.
What to ask the supplier before you commit to a puncture count
Ask for the reseal force curve, not the puncture count. The puncture count is a derived number that depends on your needle, your torque, and your temperature. The reseal force curve is the underlying data. A supplier who can give you reseal force in newtons versus puncture number for a 23-gauge needle at 25 °C and 60 °C is a supplier who has actually tested the septum. A supplier who quotes “100 punctures” without a gauge and a temperature is quoting a marketing number.
Ask for the septum thickness tolerance. A 1 mm nominal septum with a ±0.1 mm tolerance has a 20% variation in compression, which translates to a 20% variation in puncture life across a lot. If the supplier cannot give you a Cpk on septum thickness, you are sizing to a nominal number that does not exist in the box.
Ask for the cap torque specification and the GPI thread reference. A 9 mm screw cap that is not GPI-compliant will not seal at 1.2 in·lb regardless of the septum. The GPI 9 mm thread is specified in the Glass Packaging Institute standard, and the cap liner compression is designed around it. For regulated methods, the container rules in U.S. EPA SW-846 set additional constraints on headspace and closure that interact with fill volume, so check the method before you finalize the fill.
For a full view of the vial and cap combinations that support these puncture budgets, Vial Supplier lists the dimensional and septum data by part number. The chromatography consumables catalogs at Agilent and Thermo Fisher also publish autosampler needle and stroke specifications that you need to match the vial geometry to.
The decision rule
Size the vial to the puncture count, not the injection count. Total punctures per vial is injections plus wash strokes plus standard additions. Puncture life is set by needle gauge (area, not diameter), septum thickness, cap torque, and temperature, in that order of influence. Fill volume should sit between 40% and 80% of nominal, dead volume below 10% of fill, and torque at 1.2 in·lb for crimp or 1.0 to 1.3 in·lb for 9 mm screw. If the arithmetic gives you fewer than 1.5 runs per vial, change the gauge or the septum thickness before you change the vial. The vial is the last variable to move, because it is the one the autosampler has to physically fit. For the full aijiren consumables range and the septum data behind these numbers, start at Aijiren, and cross-check the method-specific constraints against Lab Chromatography before you lock the fill volume into the SOP.
References & further reading
Related resources from our lab consumables network:
- Aijiren at aijirentech.com
- Vials With Caps at vialswithcaps.com
- Vial Supplier at vialsupplier.com
- Lab Chromatography at labchromatography.com
External references and standards: